Key Takeaways:
- AeroPress is a versatile and efficient coffee brewing method.
- It allows for quick and easy coffee extraction with a clean and smooth taste.
- Experiment with different grind sizes and brew times to find your preferred flavor profile.
- The AeroPress is a portable and travel-friendly brewing device that is perfect for coffee enthusiasts on the go.
Are you tired of spending a fortune on fancy coffee shops just to get your morning caffeine fix? Well, what if I told you that you could brew your own barista-quality coffee right at home?
Enter the AeroPress – a game-changer in the world of coffee brewing.
But how does this magical device work, and how can you use it to make the perfect cup of joe? In this article, we’ll dive into the step-by-step process of using an AeroPress, along with some expert tips and tricks to take your coffee game to the next level.
Get ready to become your own personal barista!
| Steps | Instructions |
| Prewet filter | Place AeroPress with paper filter on a cup or mug, pour hot water through the filter to remove paper taste and warm the brewer. |
| Add coffee | Add grounded coffee to the AeroPress. Use the amount recommended for your desired strength and taste. |
| Add water | Pour hot water into the AeroPress up to the desired level. Stir gently to make sure all coffee grounds are wet. |
| Steep | Allow coffee to steep for the desired time (usually 1-2 minutes). |
| Press | Attach the plunger to the AeroPress and gently press down until all the liquid is extracted. |
| Serve | Pour the brewed coffee into your cup and enjoy! |
AeroPress Brewing Process
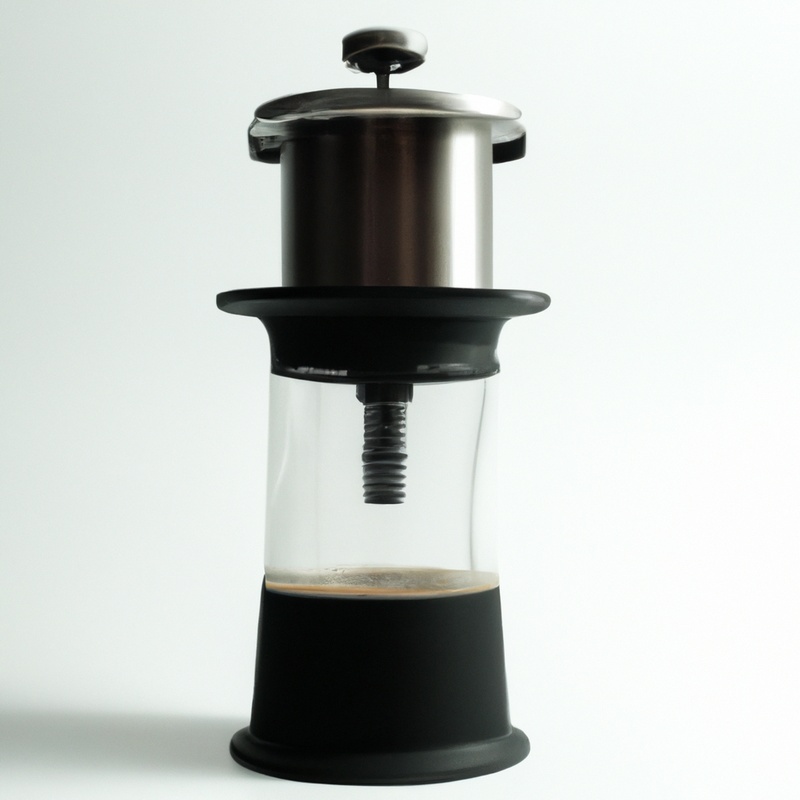
To brew coffee using an AeroPress, you will go through a simple process involving gathering equipment, preparing the AeroPress, grinding the coffee beans, adding the grounds to the AeroPress, adding hot water, stirring and brewing, plunging and extracting the coffee, and finally, cleaning up and maintaining the AeroPress.
Step 1: Gather the necessary equipment
To start brewing coffee with an AeroPress, you’ll need the following equipment:
- AeroPress: This is the main brewing device.
- Filters: The AeroPress uses special microfilters to remove sediment and produce a clean cup of coffee.
- Coffee beans: Choose high-quality, freshly roasted beans for the best flavor.
- Grinder: To grind your beans just before brewing, a burr grinder is recommended.
- Kettle: You’ll need a kettle to heat water to the desired temperature.
- Scale: Although optional, a scale can help you accurately measure your coffee and water ratios.
- Stirring utensil: A spoon or paddle can be used to stir the coffee grounds and water.
- Timer: Having a timer handy will help ensure precise steeping times.
- Mug or server: Finally, have a cup or server ready to pour your delicious coffee into.
That’s it! With these tools in hand, you’re ready to kickstart your AeroPress coffee brewing journey.

Step 2: Prepare the AeroPress
To prepare the AeroPress, start by wetting a paper filter and placing it inside the filter cap. Preheat your AeroPress and mug with hot water, then discard the water.
Grind your coffee beans to a medium-fine consistency.
Add the ground coffee into the AeroPress chamber. Place the AeroPress over the mug and pour hot water (around 200°F) into the chamber, saturating the coffee grounds.
Stir gently for about 10 seconds, then insert the plunger and press down gradually.
Enjoy your freshly brewed coffee!

Step 3: Grind your coffee beans
To grind your coffee beans, start by selecting the appropriate grind size based on your brewing method. For AeroPress, a medium grind is preferred.
Use a burr grinder for a consistent grind and adjust the settings accordingly.
Measure the desired amount of whole beans and add them to the grinder. Press the grind button and let the grinder do its job.
Once the beans are ground, transfer them immediately to the AeroPress for brewing.
Freshly ground beans will enhance the flavor and aroma of your coffee. Enjoy your delicious cup!

Step 4: Add coffee grounds to AeroPress
When adding coffee grounds to your AeroPress, start by placing the paper filter inside the cap and attaching it to the chamber.
Then, screw the cap onto the chamber securely.
Next, place the AeroPress on top of your coffee mug or pitcher.
Measure out the desired amount of coffee grounds and add them to the chamber.
Make sure the grounds are evenly distributed and level.
Remember to use freshly ground coffee for the best flavor.
Step 5: Add hot water
Step 5: Add hot water Now it’s time to add hot water to your AeroPress.
Make sure the water is heated to around 175-185°F (79-85°C) for optimal brewing.
- Start pouring slowly, allowing the water to saturate the coffee grounds evenly.
- Aim for a total brewing time of 1-2 minutes.
- The water level should reach just below the rim of the AeroPress chamber.
- Give it a gentle stir to ensure all the grounds are fully immersed in the water.
- Once the brewing time is up, press down on the plunger steadily and firmly to extract the brewed coffee.
Step 6: Stir and brew
Now that you’ve situated your AeroPress on top of your coffee mug, it’s time for Step 6: Stir and brew.
Take the stirring paddle that came with your AeroPress and give the coffee grounds a good stir.
This helps to ensure that all the grounds are fully immersed in the water, allowing for a more even extraction of flavor.
After stirring for about 10 seconds, let the coffee brew for another 60 seconds.
This step is essential to achieving a rich and well-balanced cup of coffee.
So, be sure not to rush it.
Step 7: Plunge and extract coffee
Now it’s time for the final step in using your AeroPress to brew that perfect cup of coffee: plunging and extracting the coffee. This step is where you’ll apply pressure to push the water through the coffee grounds and into your cup below.
To start, firmly hold the plunger handle with one hand and the AeroPress chamber with the other.
Slowly and steadily apply downward pressure to push the plunger all the way to the bottom of the chamber. This pressure will force the brewed coffee through the filter and into your cup.
Remember, the speed at which you plunge can affect the taste of your coffee.
If you plunge too quickly, you may end up with weak, under-extracted coffee. If you plunge too slowly, you may over-extract and end up with a bitter taste.
Find a pace that works for you and experiment to find your desired strength and flavor.
Once you’ve finished plunging, carefully remove the AeroPress from your cup, give it a quick rinse, and you’re ready to enjoy your freshly brewed coffee. Happy brewing!
Step 8: Cleanup and maintenance
After brewing your coffee using an AeroPress, it’s important to clean and maintain the device properly to ensure optimal performance and extend its lifespan.
Here are a few simple steps to follow for cleanup and maintenance:
- Immediately after brewing, detach the filter cap and push the coffee grounds into the trash or compost.
- Remove the filter from the filter cap and rinse both parts with warm water to remove any remaining residue.
- Use a mild detergent and a soft brush or cloth to gently clean the AeroPress body, plunger, and filter cap.
- Rinse all parts thoroughly with warm water to remove any soap residue.
- Allow the AeroPress to air dry completely before reassembling it.
- Store the AeroPress in a clean, dry place to avoid any potential damage.
By regularly cleaning and maintaining your AeroPress, you can enjoy delicious coffee for years to come.
Happy brewing!
Tips and Tricks for Using an AeroPress
Experiment with grind sizes and ratios for different flavors
Experiment with different grind sizes and coffee-to-water ratios
Experimenting with different grind sizes and coffee-to-water ratios can greatly impact the taste of your AeroPress coffee.
Try using a coarser grind for a lighter, more delicate brew, or a finer grind for a bolder, stronger flavor.
Likewise, adjusting the ratio of coffee to water can result in varying strengths and intensities.
Don’t be afraid to play around with these variables until you find the perfect combination that suits your taste preferences.
Happy brewing!
Adjust brewing time for desired flavor strength
Adjusting the brewing time is key to achieving your desired flavor strength with the AeroPress. Brew for a shorter time, around 1 minute, for a lighter and more delicate taste.
Increase the brewing time to 2 minutes or more for a stronger and bolder flavor profile.
Experiment with different timings to find your perfect balance. Remember, the longer you brew, the stronger the flavor.
Use water at the right temperature
To brew the perfect cup of coffee with your AeroPress, using water at the right temperature is key.
The ideal temperature for brewing coffee is between 195 to 205 degrees Fahrenheit (90 to 96 degrees Celsius).
Water that is too hot can result in bitter flavors, while water that is too cool can lead to under-extraction and a weak brew.
Use a thermometer to ensure your water is within this range, or simply let your boiled water sit off the heat for about 30 seconds before pouring it into your AeroPress.
Try inverted brewing method for bolder flavors
If you want to elevate the flavors in your AeroPress coffee, try the inverted brewing method.
Here’s how it works:
- Start by removing the plunger from the chamber and flipping the AeroPress upside down.
- Add your coffee grounds and pour hot water into the chamber.
- Give it a stir, then let it steep for the desired amount of time.
- After steeping, attach the filter and cap to the chamber.
- Flip the AeroPress onto your mug or carafe, and slowly press down on the plunger to extract the coffee.
Inverting the AeroPress allows for a longer brewing time and stronger extraction, resulting in bold and flavorful coffee.
Give it a try and taste the difference for yourself!
Explore different brewing recipes and techniques
Sure, here’s a straightforward and concise response on exploring different brewing recipes and techniques:
- Experiment with your grind size: Adjusting the fineness or coarseness of your coffee grounds can impact the flavor and strength of your brew.
- Try different water temperatures: Brewing coffee at different temperatures can bring out different nuances in flavor. Experiment with water ranging from 195°F to 205°F (90°C to 96°C to find your preferred taste.
- Play with brew times: The duration of steeping time can affect the intensity of your brew. Consider shorter or longer brewing times to experiment with different strengths and flavors.
- Explore different coffee-to-water ratios: Adjusting the ratio of coffee-to-water can significantly impact the taste of your brew. Play around with different ratios to find your desired strength and flavor profile.
- Discover alternative brewing methods: Besides the standard brewing technique, explore other methods like the inverted method, cold brew, or adding spices and flavors to your coffee grounds for a unique taste experience.
Remember, coffee brewing is a personal journey, and it’s all about discovering your own preferences.
Have fun exploring different brewing recipes and techniques to find the perfect cup of coffee that suits your taste buds!
Frequently Asked Questions about AeroPress
How long does it take to brew coffee with an AeroPress?
Brewing coffee with an AeroPress is quick and efficient. It typically takes around 1 to 2 minutes to brew a fresh cup of coffee using this method.
The AeroPress uses a combination of immersion and pressure to extract flavors from the coffee grounds, resulting in a rich and flavorful brew in a short amount of time.
The speed of brewing is one of the many reasons why coffee enthusiasts love using an AeroPress.
What type of coffee grind is best for AeroPress?
The best type of coffee grind for AeroPress is medium-fine.
This grind size allows for optimal extraction and produces a balanced and flavorful cup of coffee.
A medium-fine grind ensures that the coffee particles are small enough to extract the desired flavors, but not so fine that they clog the AeroPress filter.
It’s important to find the right balance to achieve the best results with your AeroPress.
Can I make espresso-style coffee with AeroPress?
Yes, you can make espresso-style coffee with an AeroPress! While traditional espresso is brewed under high pressure, the AeroPress uses a different method.
By using a fine grind, a shorter brew time, and adding pressure during extraction, you can achieve a concentrated and flavorful coffee similar to espresso.
However, it’s important to note that the result won’t be exactly the same as a traditional espresso shot.
Keep experimenting with different brewing techniques and grind sizes to find your perfect brew!
Is AeroPress portable for travel?
The AeroPress is highly portable and perfect for travel! Its compact size and lightweight design make it easy to pack in your luggage or carry-on.
Plus, it’s made of durable materials, so it can withstand the bumps and jostles of being on the go.
Whether you’re camping, staying at a hotel, or exploring a new city, you can enjoy a delicious cup of coffee wherever you are with the AeroPress.
Don’t forget to pack some coffee beans and filters too!
How do I clean an AeroPress?
To clean an AeroPress, disassemble the brewer by removing the filter cap, plunger, and filter basket. Rinse these components with warm water to remove any coffee grounds.
If there are stubborn deposits, use a mild detergent or coffee cleaner to scrub them away.
After cleaning, rinse everything thoroughly with water again. Lastly, dry all the parts before reassembling the AeroPress for future use.
Final Verdict
The AeroPress is a versatile and convenient brewing method that produces a flavorful cup of coffee. By following the simple steps outlined in this guide and experimenting with different grind sizes, coffee-to-water ratios, and brewing techniques, you can customize your coffee to your liking.
Whether you’re a coffee aficionado or a novice, the AeroPress offers a user-friendly approach to creating a delicious cup of coffee with minimal cleanup.
So, go ahead and start brewing with confidence, knowing that your AeroPress is an essential tool that will elevate your coffee experience. Happy brewing!
