
Key Takeaways:
- Check the water reservoir to ensure it is properly filled.
- Clean the coffee maker to remove any built-up residue.
- Verify that the brewing temperature is set correctly.
- Examine the coffee grounds and filter to ensure they are not causing any blockages.
Having a morning routine disrupted by a coffee maker that won’t brew can be frustrating.
Picture this: you pour the water, add your favorite coffee grounds, press the start button, and…nothing.
But don’t panic! In this article, we’ll be diving into the common issues that cause coffee makers to stop brewing, and more importantly, how to fix them.
From checking the power source to inspecting the heating element, we’ve got you covered with troubleshooting steps and helpful tips to ensure your coffee maker is back to brewing your perfect cup of joe in no time.
So grab your notepad and let’s get started!
| Problem | Possible Solutions |
|---|---|
| Clogged water line | Clean and descale the coffee maker |
| Blocked filter | Replace the filter or clean it thoroughly |
| Malfunctioning pump | Contact the manufacturer for repair or replacement |
| Empty water reservoir | Fill the water reservoir with fresh water |
| Power supply issue | Check the power cord and outlet |
| Improper brewing settings | Adjust the brewing settings according to the manual |
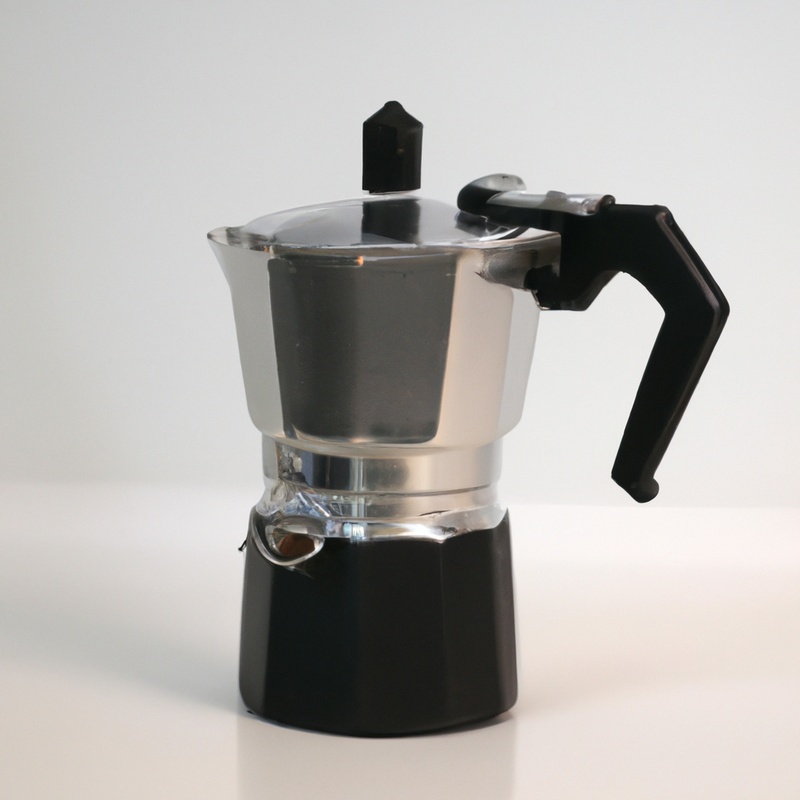
Common Issues with Coffee Makers
Coffee Maker Not Brewing?
Check the power source and water supply, clean the coffee maker, inspect the brewing mechanism, and inspect the heating element to troubleshoot common issues.
Coffee Maker Not Brewing
If your coffee maker is not brewing, there are a few things you can check to troubleshoot the issue.
Firstly, make sure the power cord is properly plugged in and the power switch is turned on.
Secondly, ensure that there is water in the reservoir and that the water level is above the minimum mark.
Thirdly, check if the coffee grounds are not too fine or packed too tightly in the filter basket.
Lastly, descale your coffee maker regularly to remove mineral buildup that can clog the machine.
Check the Power Source
To check the power source of your coffee maker, make sure it is properly plugged into the outlet. Look for any loose connections or damaged cords.
If the outlet is controlled by a switch, make sure the switch is turned on.
You can also try using a different outlet to rule out any issues with the current one. If the power source is not the problem, you may need to look into other potential issues with your coffee maker.
Verify Water Supply
To verify the water supply of your coffee maker, start by checking if the water reservoir is properly filled.
Ensure that it is filled up to the recommended level indicated by the manufacturer.
Also, make sure that the water reservoir is firmly in place and not loose or misaligned.
Next, confirm that the water supply valve or source is turned on and providing water.
Check if there are any kinks or blockages in the water supply line that may be preventing water flow.
Remove any obstacles or clean out any clogs to ensure a smooth water supply.
Remember to also check if the power outlet where your coffee maker is plugged in is working properly.
Sometimes, a faulty outlet can cause the coffee maker to not receive enough power to operate.
Try plugging the coffee maker into a different outlet to see if that resolves the issue.
If you have tried all of these steps and are still experiencing problems with your coffee maker not brewing, it may be best to consult the manufacturer’s troubleshooting guide or contact their customer support for further assistance.
Clean the Coffee Maker
To clean your coffee maker effectively, start by removing any used coffee grounds from the filter basket and discarding them. Then, wash the filter and the pot with warm, soapy water to remove any residue.
Next, fill the water reservoir with equal parts of white vinegar and water.
Run a brewing cycle with this mixture, allowing it to clean the inside of the coffee maker. Once the cycle is complete, run a couple of brewing cycles with fresh water to rinse out any remaining vinegar taste.
Remember to clean the exterior of your coffee maker regularly as well, using a damp cloth to wipe away any spills or stains.
With these simple steps, you can keep your coffee maker clean and ensure that every cup of coffee tastes fresh and delicious.
Check Brewing Mechanism
Check Brewing Mechanism: To fix a coffee maker that won’t brew, it’s important to start by checking the brewing mechanism. Here’s what you can do:
- Clean the coffee maker: Buildup of mineral deposits or coffee oils can clog the mechanism. Regular cleaning with vinegar or a commercial coffee maker cleaner can help.
- Check the water reservoir: Make sure there is enough water in the reservoir. Some coffee makers have a minimum level that needs to be met for brewing to occur.
- Inspect the filter and grounds: Verify that the filter is properly placed and not torn. Also, check if the coffee grounds are the correct size and not too fine or too coarse.
- Examine the brewing button: Ensure that the brewing button or switch is in the correct position. If it’s loose or faulty, it may not engage the mechanism properly.
- Look for potential blockages: Examine the tubes or hoses for any clogs or obstructions. Use a pipe cleaner or small brush to remove any debris.
By checking and addressing these issues with the brewing mechanism, you may be able to troubleshoot and fix the problem with your coffee maker.
Inspect Heating Element
Inspecting the heating element is an important step if your coffee maker won’t brew. Here’s what you need to do:
- Unplug the coffee maker and allow it to cool down completely.
- Locate the heating element, which is usually located under the carafe or inside the water reservoir.
- Carefully examine the heating element for any signs of damage or malfunction, such as burning or cracking.
- If you notice any visible issues, it is likely that the heating element needs to be replaced. Contact the manufacturer or a professional repair service for assistance.
- If the heating element appears to be intact, use a multimeter to test its continuity. This will help determine if the heating element is still functional.
- If the multimeter shows no continuity, it indicates a faulty heating element that needs to be replaced.
- If the heating element passes the continuity test, other components of the coffee maker might be causing the brewing issue.
Remember, it is always a good idea to consult the user manual or contact the manufacturer for specific instructions on inspecting and replacing the heating element of your particular coffee maker model.
Troubleshooting Steps for a Coffee Maker That Won’t Brew
Having trouble with your coffee maker? Here are some troubleshooting steps to help you fix it.
Step 1: Check the Power Source
Step 1: Check the Power Source When your coffee maker doesn’t brew, the first thing to do is check the power source. Ensure that your coffee maker is plugged in properly and that the outlet is working.
Sometimes, the power cord may be loose or damaged, so check that as well.
If needed, try plugging the coffee maker into a different outlet to see if that solves the problem. Making sure your coffee maker has a steady power supply is essential for it to work properly.
Step 2: Verify Water Supply
Step 2: Verify Water Supply When your coffee maker won’t brew, one possible issue could be with the water supply.
Here’s what you can do to check it:
- Ensure that the water reservoir is properly filled and the lid is closed tightly. Sometimes, an open lid can prevent water flow.
- Check if the water line or tube is clogged. Detach the water line from the back of the machine and gently blow into it or use a pipe cleaner to remove any blockage.
- Inspect the water filter if your coffee maker has one. Clean or replace it if necessary, as a dirty filter can restrict water flow.
By verifying the water supply, you can eliminate this potential problem and move on to the next troubleshooting step.
Step 3: Clean the Coffee Maker
Step 3: Clean the Coffee Maker Cleaning your coffee maker is an important step to ensure a delicious cup of coffee every time. Here’s how you can do it:
- Start by removing any used coffee grounds and the filter.
- Wash the filter and other removable parts with warm, soapy water. Rinse them thoroughly.
- For the coffee pot, mix equal parts of white vinegar and water, and pour it into the reservoir. Run a brew cycle without any coffee grounds.
- Once the cycle is complete, discard the vinegar solution. Run two cycles of clean water through the coffee maker to get rid of any vinegar residue.
- Wipe down the exterior of the machine using a damp cloth.
- Reassemble all the parts and your coffee maker will be clean and ready to brew your next cup of coffee!
Remember to clean your coffee maker regularly to prevent any build-up and to maintain its performance. Cheers to a great cup of coffee!
Step 4: Check Brewing Mechanism
Step 4: Check Brewing Mechanism Make sure the brewing mechanism is clean and free from any obstructions.
Check for any clogs or blockages in the tubes, filters, or valves.
Clean them thoroughly with warm, soapy water and a brush.
Check the water level and ensure it reaches the appropriate level.
If the brewing mechanism still doesn’t work, it may be a sign of a more serious issue and it might be time to consider professional repair or replacement options.
Step 5: Inspect Heating Element
Step 5: Inspect Heating Element To troubleshoot a coffee maker that won’t brew, it’s important to inspect the heating element.
Start by checking if there are any visible signs of damage or corrosion.
If you notice any, it may need to be replaced.
Also, ensure that the heating element is securely connected to the power source and wiring.
If everything looks fine, you can use a multimeter to test the continuity of the heating element.
Step 6: Run a Test Brew
To run a test brew, start by making sure you have enough water in the reservoir and coffee grounds in the filter. Next, turn on the coffee maker and wait for it to complete a full brew cycle.
Pay attention to any strange sounds or leaks during the process.
If the machine still doesn’t brew, try cleaning the machine and descaling it if needed. Running a test brew can help identify any issues and determine if further troubleshooting is necessary.
Helpful Tips to Avoid Brew Issues
Regular cleaning and maintenance can help prevent brew issues with your coffee maker.
Regular Cleaning and Maintenance
Regular cleaning and maintenance are key to keeping your coffee maker in good working condition. Here are a few simple steps you can take:
- Clean the removable parts, such as the carafe and filter basket, after each use. Use warm soapy water and a soft brush to remove any coffee residue.
- Regularly descale your coffee maker to remove mineral buildup. Follow the manufacturer’s instructions for the descaling process, which often involves a vinegar solution.
- Wipe down the exterior of the coffee maker with a damp cloth to remove any dirt or fingerprints.
- Check the water reservoir for any debris or buildup and clean it as needed.
- Replace the coffee filter regularly to ensure optimal brewing performance.
By taking these simple cleaning and maintenance steps, you can prolong the life of your coffee maker and ensure that each brew is as delicious as the last. Happy brewing!
Use Freshly Ground Coffee Beans
Using freshly ground coffee beans is essential for a great-tasting brew. Here’s why:
- Freshness matters: Grinding coffee beans right before brewing helps preserve the aromatic oils that give coffee its rich flavor.
- Enhanced flavor: Freshly ground coffee beans release more complex flavors compared to pre-ground coffee, resulting in a more enjoyable and flavorful cup of coffee.
- Better extraction: The small, uniform particles obtained from grinding beans enhance the extraction process, allowing for a well-balanced and full-bodied coffee.
To ensure a delicious cup of coffee, invest in a good quality grinder and grind your beans just before brewing. The difference in taste will be worth it!
Proper Water-to-Coffee Ratio
To achieve a great-tasting cup of coffee, getting the water-to-coffee ratio right is key.
Aim for a ratio of 1:18, which means using 1 gram of coffee for every 18 grams of water.
Adjust the ratio to your taste preferences, but be careful not to go too far from this range.
Measuring by weight instead of volume is more accurate.
Also, remember to use fresh, filtered water to enhance the flavor of your brew.
Experiment with the ratio, and you’ll find the perfect balance for your daily cup of joe.
Correct Placement of Coffee Filter
To ensure the correct placement of the coffee filter, simply follow these steps:
- Open the coffee maker and locate the filter basket.
- Take out the filter basket and check for any remnants of old filters.
- Place a new filter into the basket, making sure it fits snugly.
- Align the filter with the brewing unit, ensuring that it covers the entire surface.
- Close the coffee maker and proceed with brewing your delicious cup of coffee.
Remember, the proper placement of the coffee filter guarantees optimal filtration and prevents any coffee grounds from entering your brew. Enjoy your perfect cup of joe!
Avoid Using Old or Stale Coffee
Using fresh coffee is key to brewing a great cup. Here’s why you should avoid using old or stale coffee:
- Flavor profiles deteriorate over time, resulting in a bland or off taste.
- Stale coffee may lack the necessary oils and compounds for a proper extraction.
- The brewing process won’t be as efficient, leading to weaker and less flavorful coffee.
- Moisture and oxygen can degrade coffee beans, so storing them properly is crucial.
Remember, freshness matters for a delicious brew!
Final Verdict
Troubleshooting a coffee maker that won’t brew can be frustrating, but with the right steps, you can get your morning cup of coffee back on track.
Start by checking the power source and verifying the water supply.
Then, clean the coffee maker and inspect the brewing mechanism and heating element.
Finally, run a test brew to ensure everything is working properly.
To avoid future issues, remember to regularly clean and maintain your coffee maker, use fresh coffee beans, and pay attention to the water-to-coffee ratio and the placement of the coffee filter.
By following these tips, you can enjoy a consistently delicious cup of coffee every time.